
The Photo That Changed Everything: How One Picture Sparked My Love for Aperture
When I (Jeff) was about six years old, my dad took a photo that, to this day, is etched in my memory.
I didn't understand it at the time, but something about it felt magical. The background seemed soft, almost dreamy, and yet I was crystal clear. That photo made me pause. Even as a kid, I remember thinking, “How did the camera do that?”
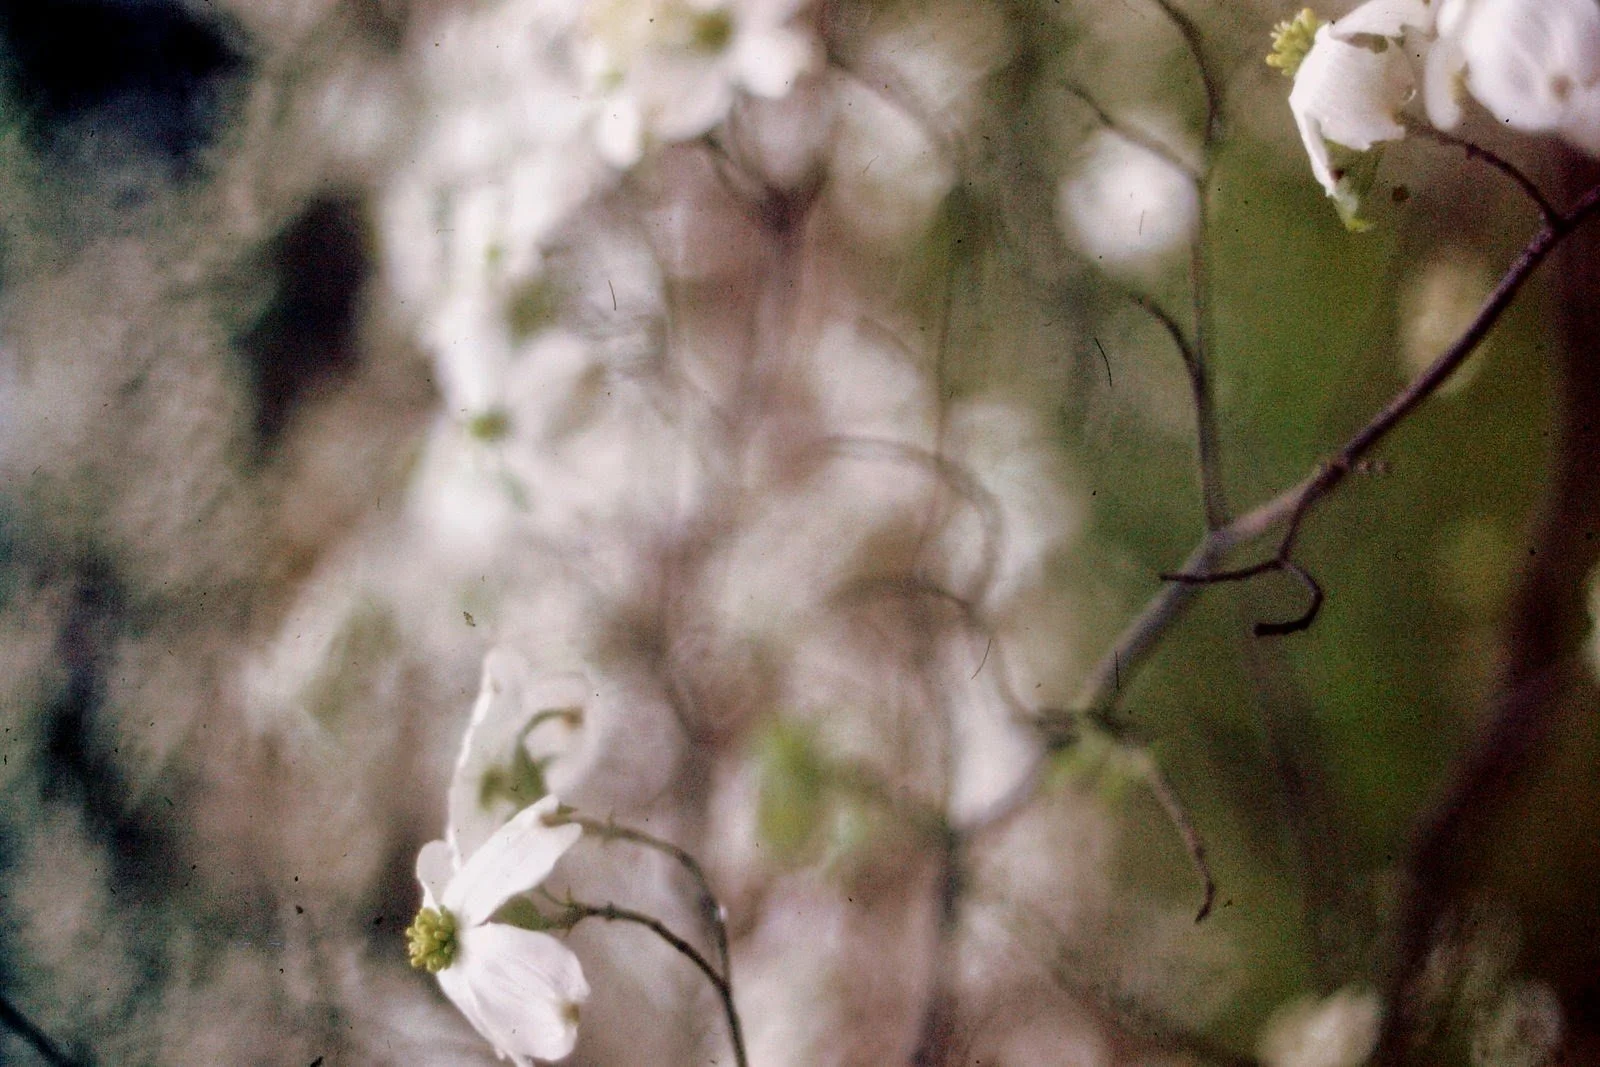
It might sound simple, but a photo my dad snapped of a dogwood tree in our backyard in the spring of 1979 still stops me in my tracks, even all these years later.
It wasn’t magic—though my dad had a great eye. What made that photo stand out was something called aperture. Learning how it worked opened up a whole new world of photography for me.
Today, I want to show you how that same concept can change the way you take photos, especially if you're ready to move past Auto mode and start creating images that feel a little more like magic.
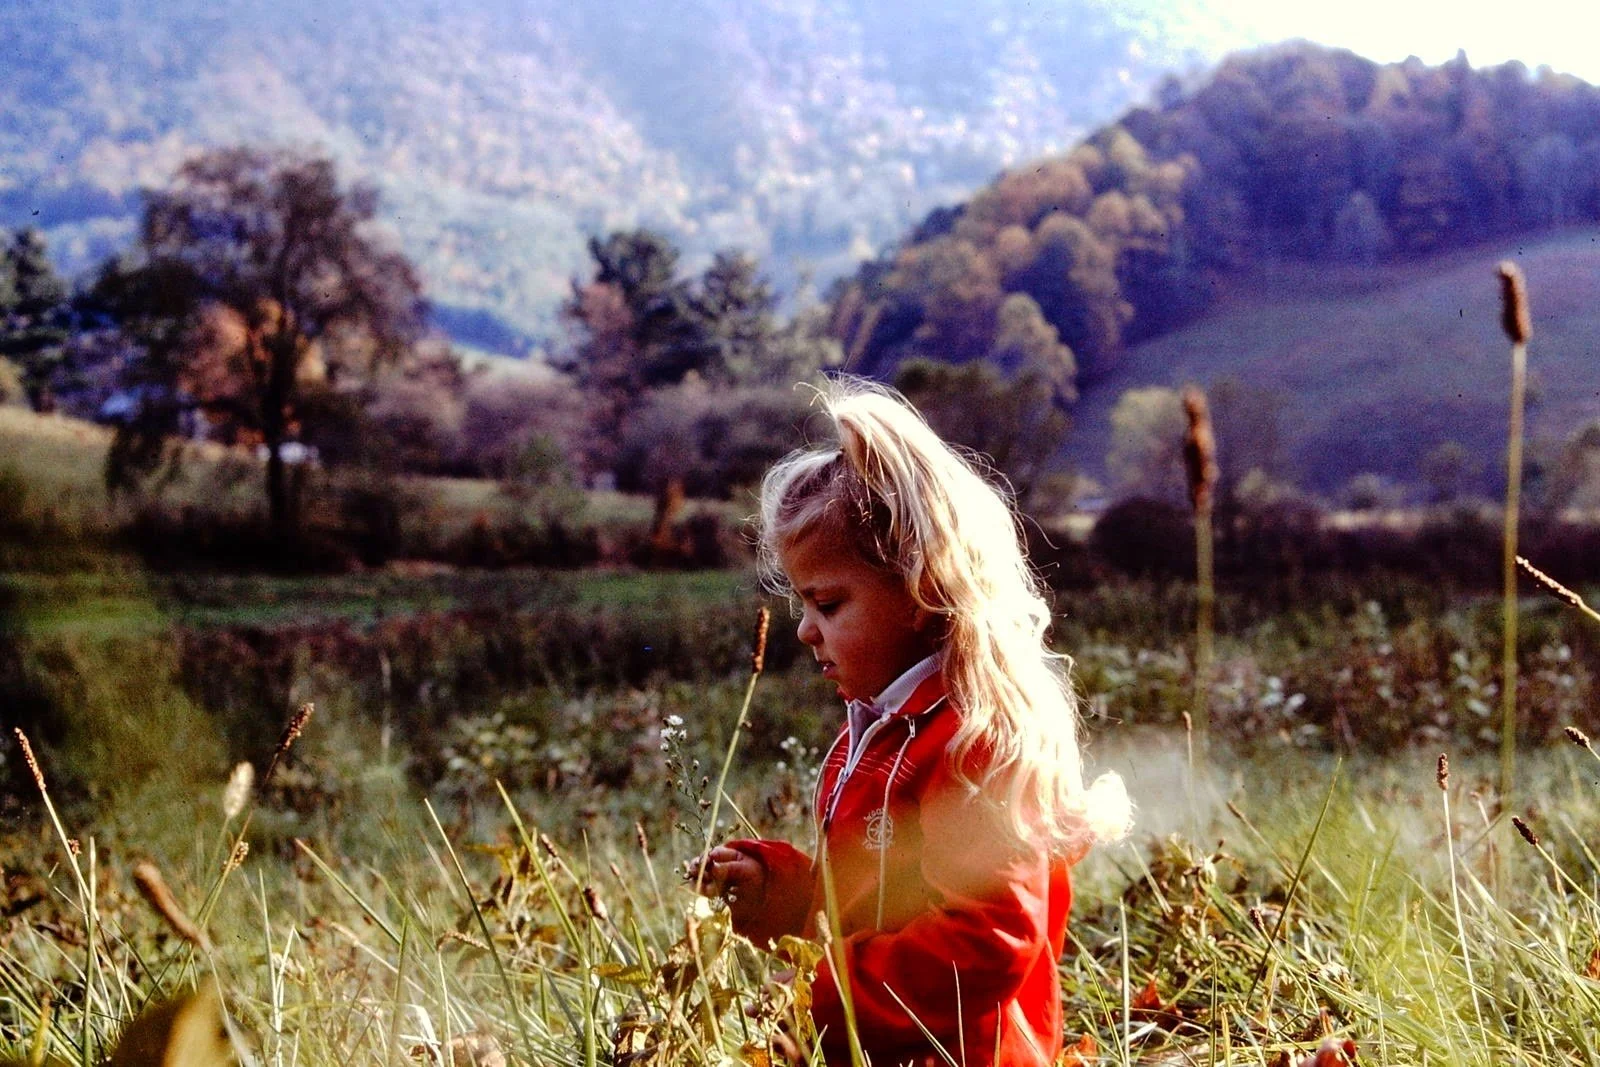
My Dad always had his manual Minolta camera with him wherever we went. This photo of my sister in the North Carolina mountains (taken in 1979) is a perfect example of how a low aperture setting can draw sharp focus to the subject while creating that beautiful background blur (and foreground blur) that makes you feel like you’re right there.
What Is Aperture?
Aperture is the opening in your lens that allows light to enter your camera. But it does more than just control brightness; it determines how much of your photo is in focus.
A wide aperture (like f/1.8 or f/2.8) = a blurry background with your subject in sharp focus. Perfect for portraits.
A narrow aperture (like f/8 or f/11) = more of the image is in focus. Great for group shots or landscapes.
If you've ever seen a photo where the background melts away and the subject just pops, that’s aperture at work.
Aperture Priority Mode: Your Creative Shortcut
If you’re not quite ready to shoot in full manual mode, there’s a perfect middle ground: Aperture Priority mode. This setting allows you to control the aperture, while your camera handles the shutter speed to achieve proper exposure. It’s a simple way to start taking more creative control of your photos without feeling overwhelmed.
Look for A (Nikon/most mirrorless) or Av (Canon) on your camera dial.
How to Use Aperture Priority Mode
Want to try it? Here’s how to get started in just a few steps:
Set your camera to Aperture Priority (A) or Aperture Value (Av) mode. This tells your camera you want to control the aperture.
Use your dial to adjust the f-number. Lower number = blurrier background Higher number = more of the scene in focus
Focus on your subject and snap the photo. Your camera will do the rest, automatically balancing the exposure.
Practice with different f-numbers. Try the same subject with f/2.8 and then f/8; you’ll see the difference instantly!
Let This Be Your “Aperture Moment”
That one photo my Dad took sparked something in me, and I hope this post sparks something in you as well. Try Aperture Priority mode this week. Whether you're snapping a photo of your toddler in the backyard or capturing a quiet moment with your teen, this one setting can take your images from snapshot to wow. You’ll never look at a blurry background the same way again.
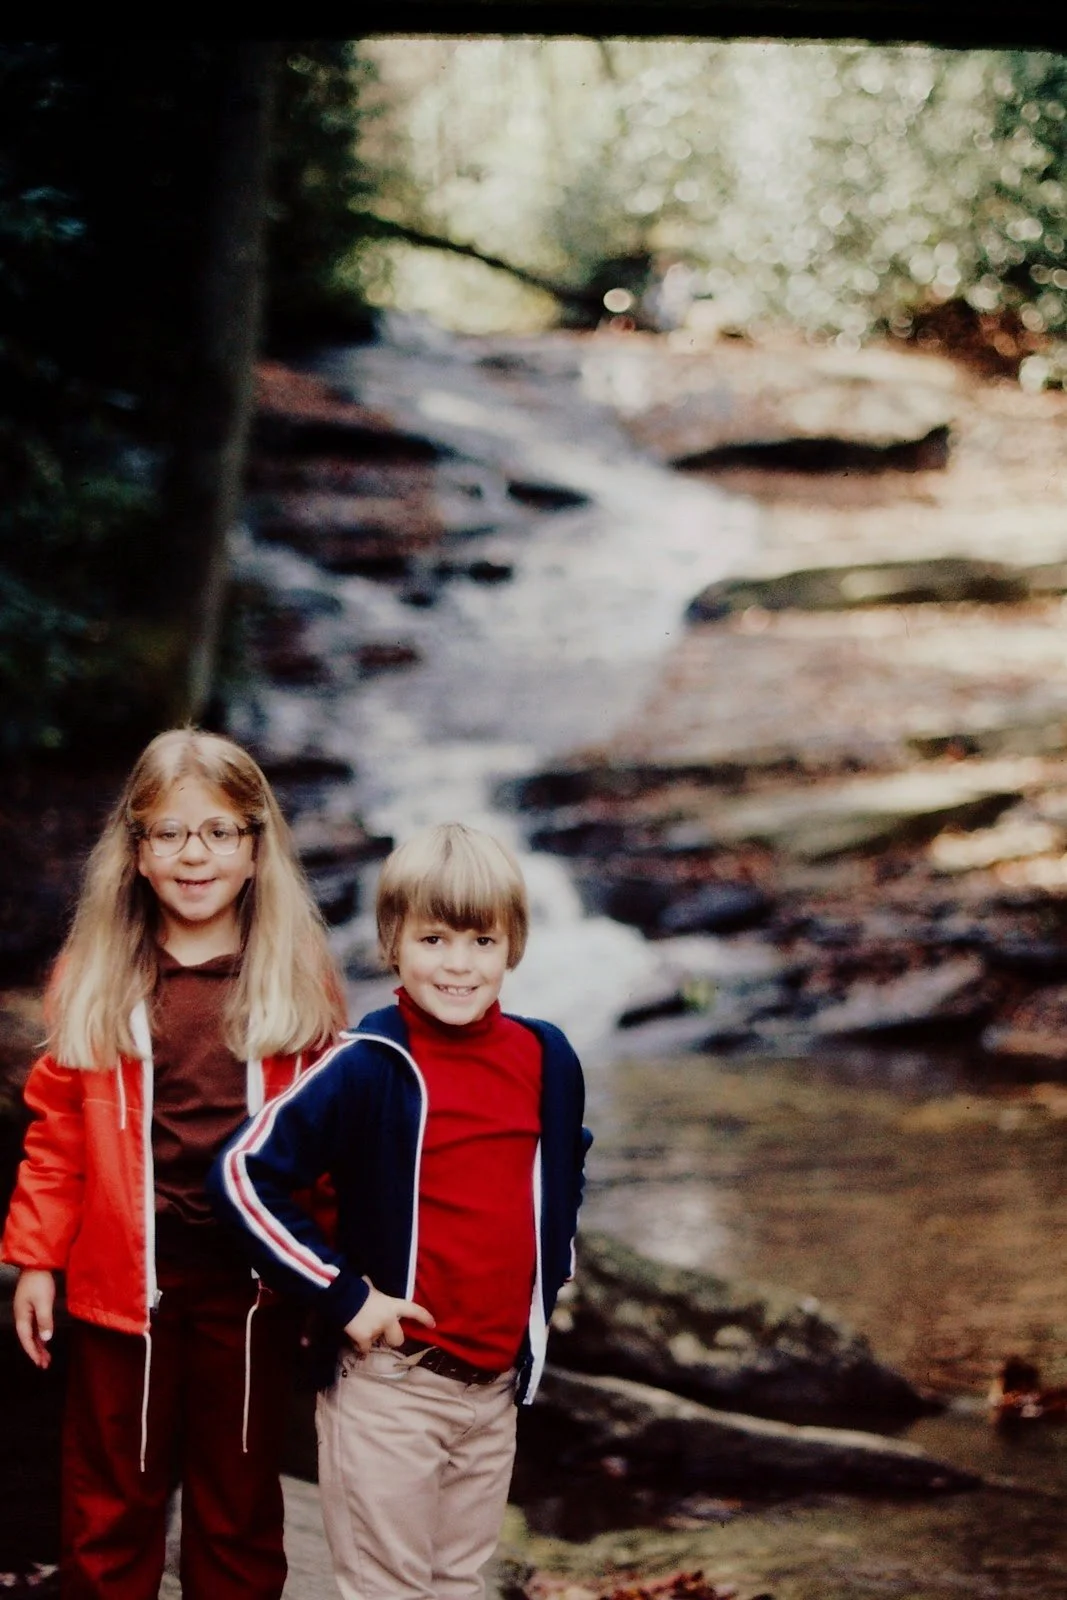
Here’s a photo of my sister and me in the North Carolina mountains back in 1979. Notice how the background is softly blurred, thanks to a low aperture—but you can still make out the waterfall gently flowing over the rocks behind us.
Need a Quick Camera Confidence Boost?
Download our free guide, 6 Tips For Sharper Family Memories. Quick tips any parent can use to capture clearer, crisper shots of your kids without needing fancy gear or a photography degree.
